Over the week, I was asked to prepare a POC that uses vRealize Automation to provision AWS workloads. Being a AWS noob, I had to reference few articles to get this going.
Here are the steps to help you:
Using: vRealize Automation 6.2.1
AWS Sign-up
- Create an AWS Account. You’ll be needing Credit Card information for this.
- After the Account Creation – you need to wait a maximum of 24 hours before you can start using it.
NOTE: you can use a Free Tier for 1 year.
Create AWS Identity and Access Management (IAM) Users
- Go to Security Credential
- Create a User
- Assign Permission to the User (In my case, for testing, I assigned Administrator permission)
- Create Security Access Key Pair
- Keep the Key Pair as you’ll be needing this in the vRA Endpoint
Create AWS Machine Image
In AWS World, AWS Machine Image (AMI) are Templates. We need to either create or copy from someone an AMI Image. This will be the basis for the Blueprint in vRA.
Official AWS Guide for AMI using using EBS storage: http://docs.aws.amazon.com/AWSEC2/latest/UserGuide/creating-an-ami-ebs.html
Official AWS Guide for AMI using Instance storage backed: http://docs.aws.amazon.com/AWSEC2/latest/WindowsGuide/Creating_InstanceStoreBacked_WinAMI.html
In a nutshell,
- Launch an EC2 Instance
- Customize how you want it (just like a VMware Template!)
- Stop EC2 Instance (optional)
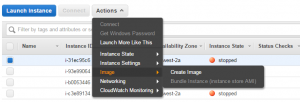
- Click Actions -> Create Image
vRealize Automation Setup
1. Create Endpoint using the Security Access Key Pair
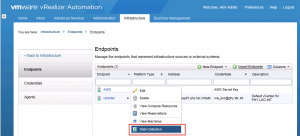
2. View Data Collection option and click Start
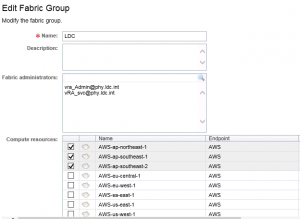
3. Once it finishes, Go to Groups -> Fabric Admin and select which region you want to deploy. I selected Asia Pacific region in my example below.
After pressing OK, this will initiate a Data Gathering procedure on the selected region.
NOTE: You should be logged on as Fabric Administrator
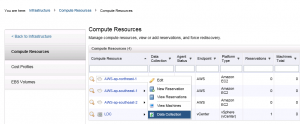
4. To monitor Data Collection, Go to Infrastructure -> Compute Resources. Highlight to the region and Select Data Collection. Mine took an hour to populate (slow internet )
vRealize Automation : Create Reservation
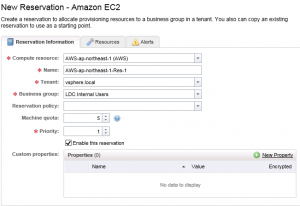
1. Go to Infrastructure -> Reservation, and fill-out the items
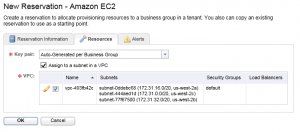
2. In the Resources Tab, choose how you want vRA to “tag” the instance created at AWS for the specific Reservation. This will depend on how you want your billing to be structured. For this example, I chose Auto-Generate per business Group.
Other options include:
– AutoGenerate Per Machine
– Specific Key Pair
3. The VPC defines where/ how the Network will be placed for the provisioned instance in this Reservation. I just use the default VPC for now.
vRealize Automation Blueprint
Now we need to create a blueprint for our Catalog so our User’s can consume it from the portal
1.Go to Infrastructure -> Blueprints and Create Amazon EC2 Blueprint
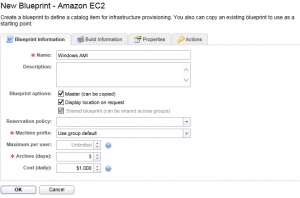
2. In the Blueprint Information page, fill-out the items. Check “Display location on request” to provide options on where to provision the Instance
 3. In the next tab, Select the Available Instance Types (specs) for the specified blueprint
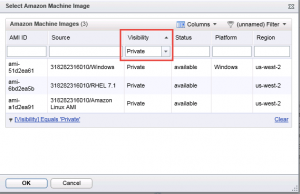
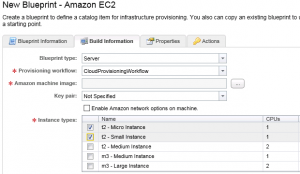 4. Click the Amazon Machine Image and Select the AMI. (Step Above)
Note: You can filter the dialog box to display only private ones (created by you!)
5. Once the Blueprint is created you need to publish it to be able to add in Catalog/ Services
vRealize Automation : Create Service
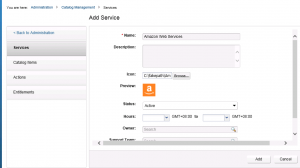
In my homelab, I created Services depending on the OS Type. This may differ depending on your strategy and how you want your users interact with the catalog.
1. Go to Administration -> Catalog Management -> Services, Add Amazon Web Service
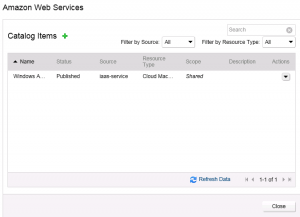
2. After creation, Highlight the newly Created Service and click Manage Catalog Items.
3. In the next window, Click the + sign and Add the new Blueprint we created on the previous section. After adding, the service should look like below
4. (OPTIONAL): Assign Icons to the Blueprint by going to Administration -> Catalog Management -> Catalog Items.
vRealize Automation : Create Entitlement
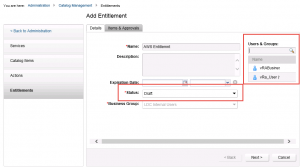
Entitlement dictates who can use the Service and/or Catalog Items
1. Go to Administration -> Catalog Management -> Entitlements, Make sure to add Users/Groups that will have access to the Entitlement. (CHOOSE ACTIVE as well)
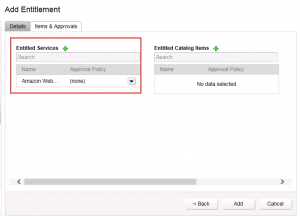
2. After clicking Next, Select the Service AND Actions you want this Entitlement to associate with.
Service:
3. Once done, you are all set in Consuming AWS Service from vRA!
Consuming the Service
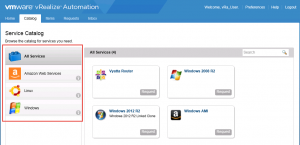
Here’s what mine looks like (Service per OS Type)
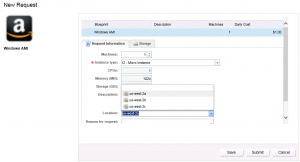
1. Once you click on the request, depending on the Blueprint was setup, it would look like below:
2. In AWS Portal, you would see the instance being provisioned. The Name field is dictated by the Machine Prefix you choose in the Blueprint section.
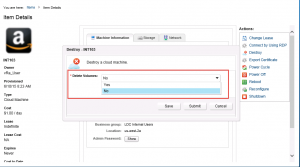
3. In vRA, if you choose to Destroy the Instance, you’ll get prompted if you want to Destroy the Volume as well. This means if you want o destroy the underlying files or just un-register the Instance.
4. Once Destroyed, it will be marked as Terminated in AWS Portal
Questions
1. How do I gain access to the Instanced from AWS?
It will be dependent on the KeyPair that was generated
2. How can I remotely access the Instance from AWS?
I will be dependent on the VPC you setup in AWS
Hope this helps!






Thank you for your sharing. I am worried that I lack creative ideas. It is your article that makes me full of hope. Thank you. But, I have a question, can you help me? https://accounts.binance.com/ar/register-person?ref=FIHEGIZ8